CRUD App Using API
Let’s create a new nodejs CRUD app with API, where we can understand the errors and the right way to program an API (“...in my opinion”). In this app, we create an Add, Edit, Read and Delete operation via API of the student information.
Let’s open the command shell window and run npm init on your particular folder directory, where you can create your app.
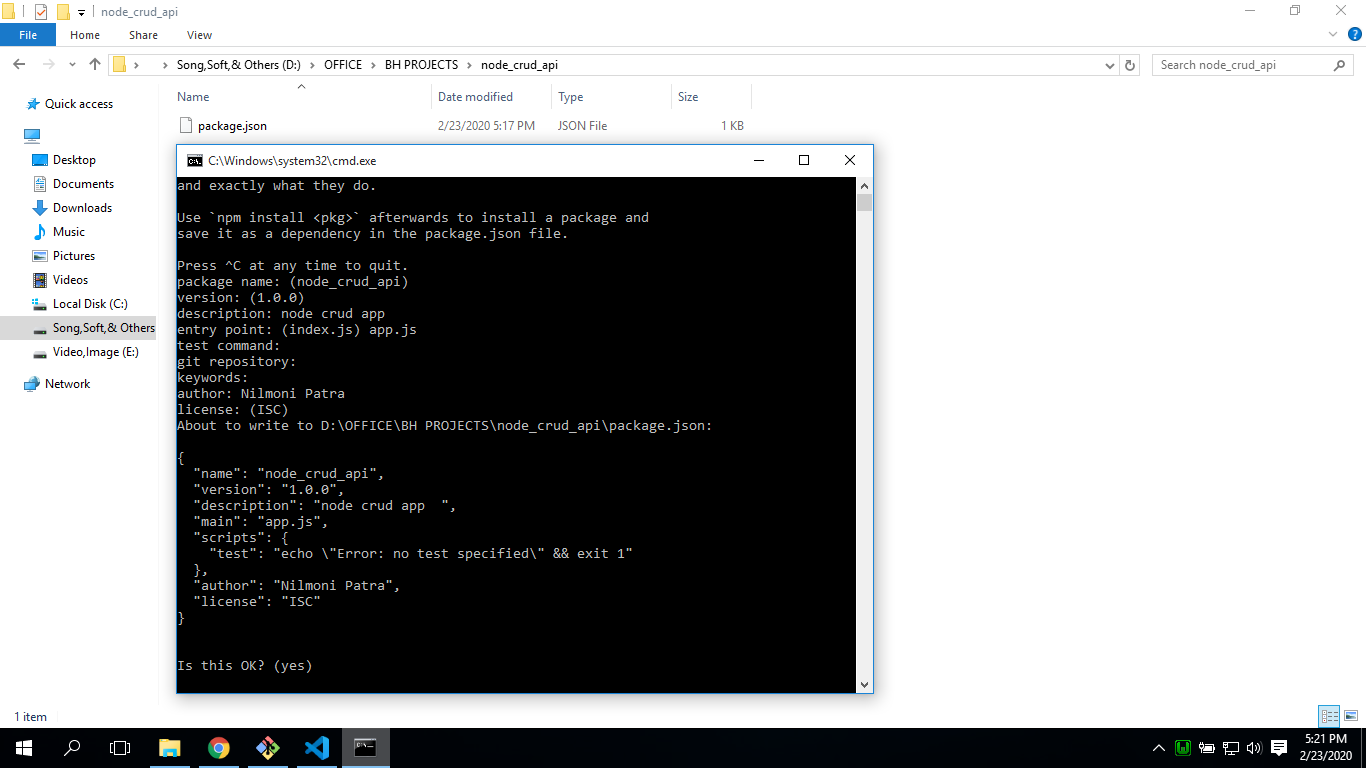
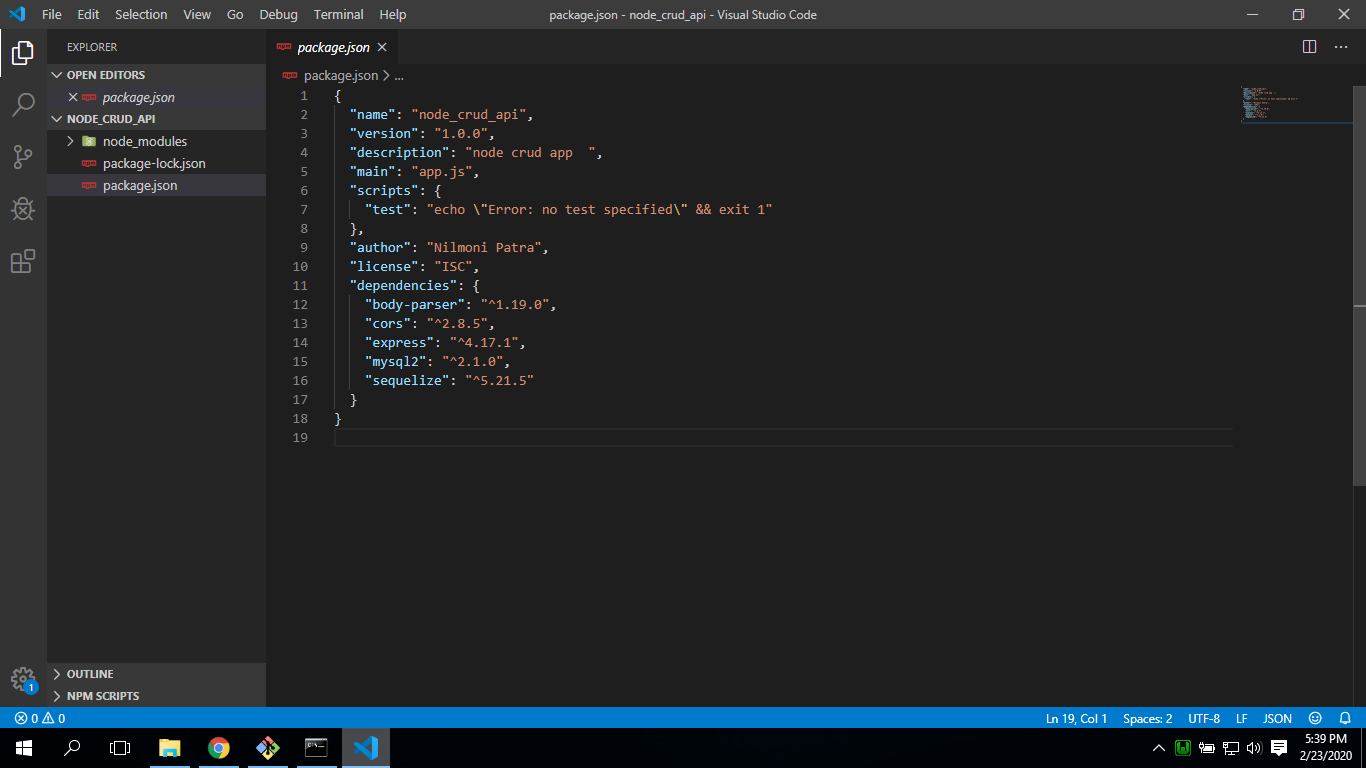
After this, we can see a package.json file is created. It is our root file where the app’s description and dependencies are defined. Now we have to install some necessary modules for your app like express, sequelize, body-parser, mysql2, cors.
To install these modules, we can write npm install express --save or we can also install all packages at the same time by writing npm install express sequelize body-parser mysql2 cors --save. After this, our package.json file looks like the following:
Now in our project root folder, we create a new file app.js. Also create four folder models, routes, controllers, and config.
In app.js
const express = require("express");
const bodyParser = require("body-parser");
const cors = require("cors");

const app = express();
var corsOptions = {
    origin: "http://localhost:8081"
  };

  app.use(cors(corsOptions));
  app.use(bodyParser.json());
  app.use(bodyParser.urlencoded({ extended: true }));
  const db = require("./models");

  db.sequelize.sync();

  app.get("/", (req, res) => {
    res.json({ message: "Welcome to our crud application." });
  });

  require("./routes/crudApplication.routes")(app);
  const PORT = process.env.PORT || 8080;
  app.listen(PORT, () => {
    console.log(`Server is running on port ${PORT}.`);
  });
  module.exports = app;
Here we do just import the modules:
- Express is for building the Rest APIs
- body-parserhelps to parse the request and create the req.body object
- corsprovides Express middleware to enable CORS with various options.
We create an Express app, then add body-parser and cors middlewares using app.use() method. Notice that we set origin: http://localhost:8080. Define a GET route that is simple for a test. And listen on port 8080 for incoming requests. If we try to run node app.js then the app does not run on this port and an error return model is not found. In that case, we have to create an index.js file in the models' folder. Where we are initializing Sequelize.
models/index.js
const dbConfig = require("../config/db.config.js");
const Sequelize = require("sequelize");
const sequelize = new Sequelize(dbConfig.DB, dbConfig.USER, dbConfig.PASSWORD, {
  host: dbConfig.HOST,
  dialect: dbConfig.dialect,
  operatorsAliases: false,
  pool: {
    max: dbConfig.pool.max,
    min: dbConfig.pool.min,
    acquire: dbConfig.pool.acquire,
    idle: dbConfig.pool.idle
  }
});
const db = {};
db.Sequelize = Sequelize;
db.sequelize = sequelize;
db.crudApplication = require("./crudApplication.model.js")(sequelize, Sequelize);
module.exports = db;
Now we create a new file on config folder db.config.js and write the code:
config / db.config.js
module.exports = {
    HOST: "localhost",
    USER: "root",
    PASSWORD: "",
    DB: "crud_app",
    dialect: "mysql",
    pool: {
      max: 5,
      min: 0,
      acquire: 30000,
      idle: 10000
    }
  };
The first five parameters are for MySQL connection. We have to create a database “crud_app” but we don’t have to create any table because due to sequelize it will be created automatically.
the pool is optional, it will be used for Sequelize connection pool configuration:
max: maximum number of connection in the pool
min: minimum number of connection in the pool
idle: maximum time, in milliseconds, that a connection can be idle before being released
acquire: max time, in milliseconds, that pool will try to get the connection before throwing an error
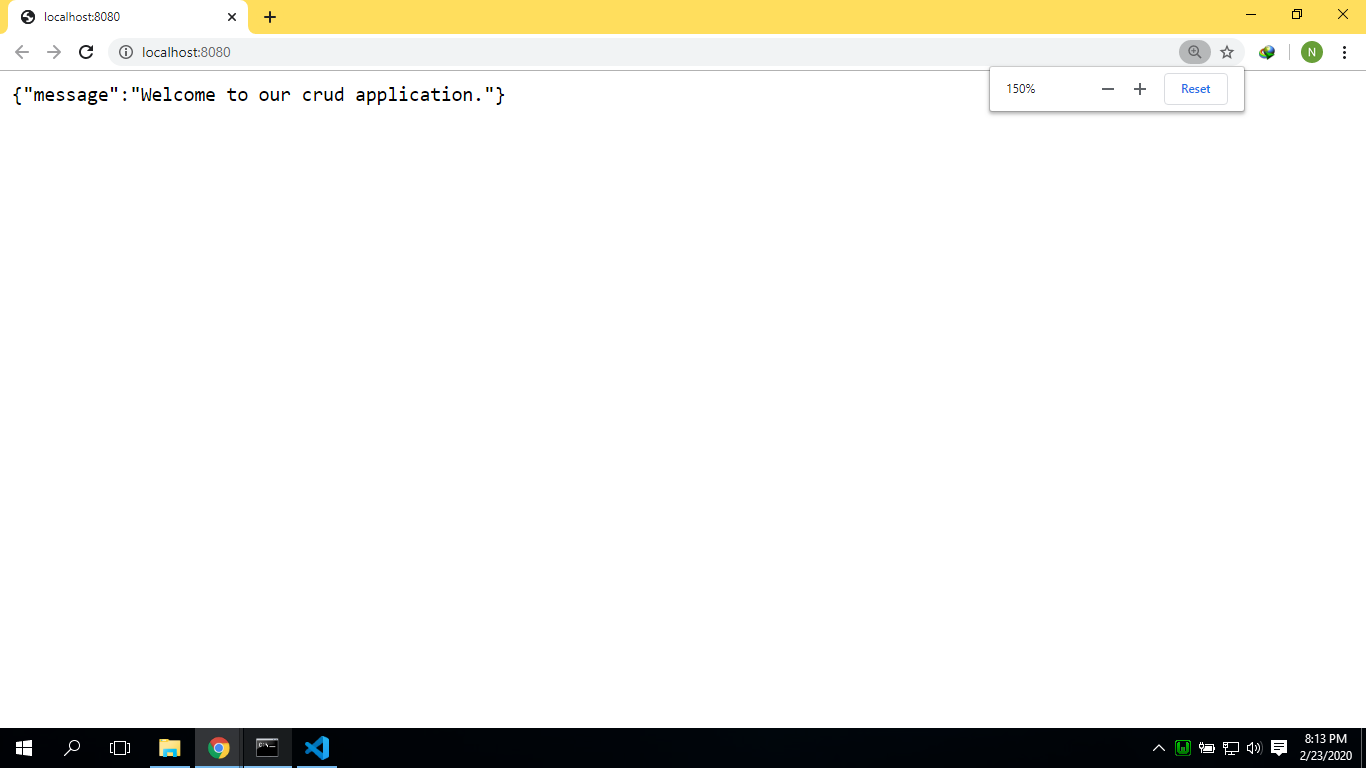
Now let’s run the app with the command: node app.js.
Open your browser with URL http://localhost:8080/, you will see:
For automatic restart of this app we install nodemon and just add "start":"nodemon" in package.json script block.
New we create crudApplication.model.js file in models folder
models/crudApplication.model.js
module.exports = (sequelize, Sequelize) => {
    const crudApplication = sequelize.define("student", {
      name: {
        type: Sequelize.STRING
      },
      email: {
        type: Sequelize.STRING
      }
    });
    return crudApplication;
  };
The model name is crudApplication and the table name is student. If we go and check our database then we can see student table is created:
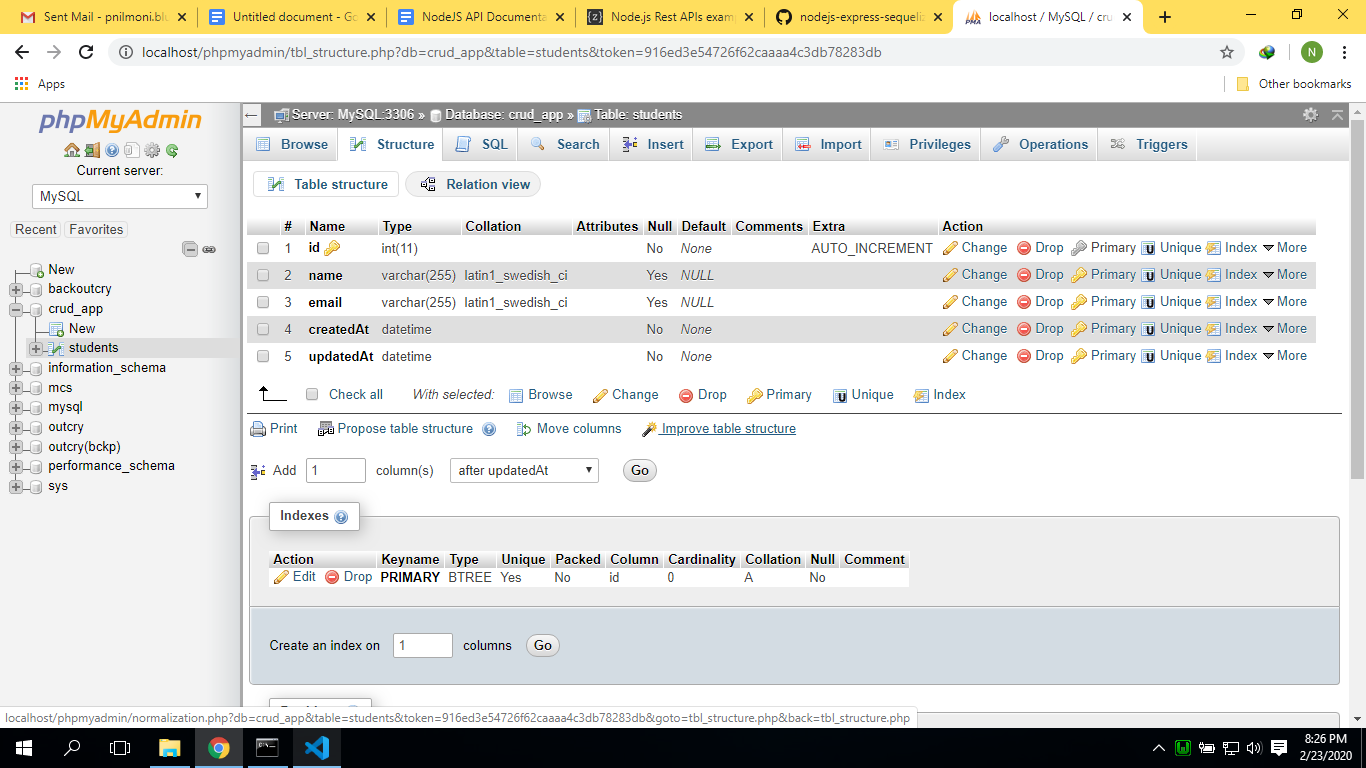
This Sequelize Model represents the student table in the MySQL database. These columns will be generated automatically: id, name, email, createdAt, updatedAt.
After initializing Sequelize, we don’t need to write CRUD functions, Sequelize supports all of them:
- create a new student: create(object)
- find a student by id: findByid(id)
- get all student: findAll()
- update a studentby id: update(data, where: { id: id })
- remove a student: destroy(where: { id: id })
These functions will be used in our Controller. Let’s create a file in controllers folder crudApplication.controller.js and create a create()
The create function will create a new student. At first, we just start to create or add operation,
const db = require("../models");
const Student = db.crudApplication;
const Op = db.Sequelize.Op;
// Create and Save a new Student
exports.create = (req, res) => {
  // Validate request
  if (!req.body.name) {
    res.status(400).send({
      message: "Content can not be empty!"
    });
    return;
  }
// Create a Student
const student = {
    name: req.body.name,
    email: req.body.email,
    };
    // Save Student in the database
    Student.create(student)
    .then(data => {
        res.status(200).send(data);
    })
    .catch(err => {
        res.status(500).send({
        message:
            err.message || "Some error occurred while creating the Student."
        });
    });
};
When a client sends a request for an endpoint using HTTP request (GET, POST, PUT, DELETE), we need to determine how the server will respond by setting up the routes.
These are our routes:
- /api/v1/student: GET, POST, DELETE
- /api/v1/student/:id: GET, PUT, DELETE
routes/crudApplication.routes.js file
module.exports = app => {
    const student = require("../controllers/crudApplication.controller.js");
    var router = require("express").Router();
    // Create a new Student
    router.post("/", student.create);
   app.use('/api/v1/student', router);
}
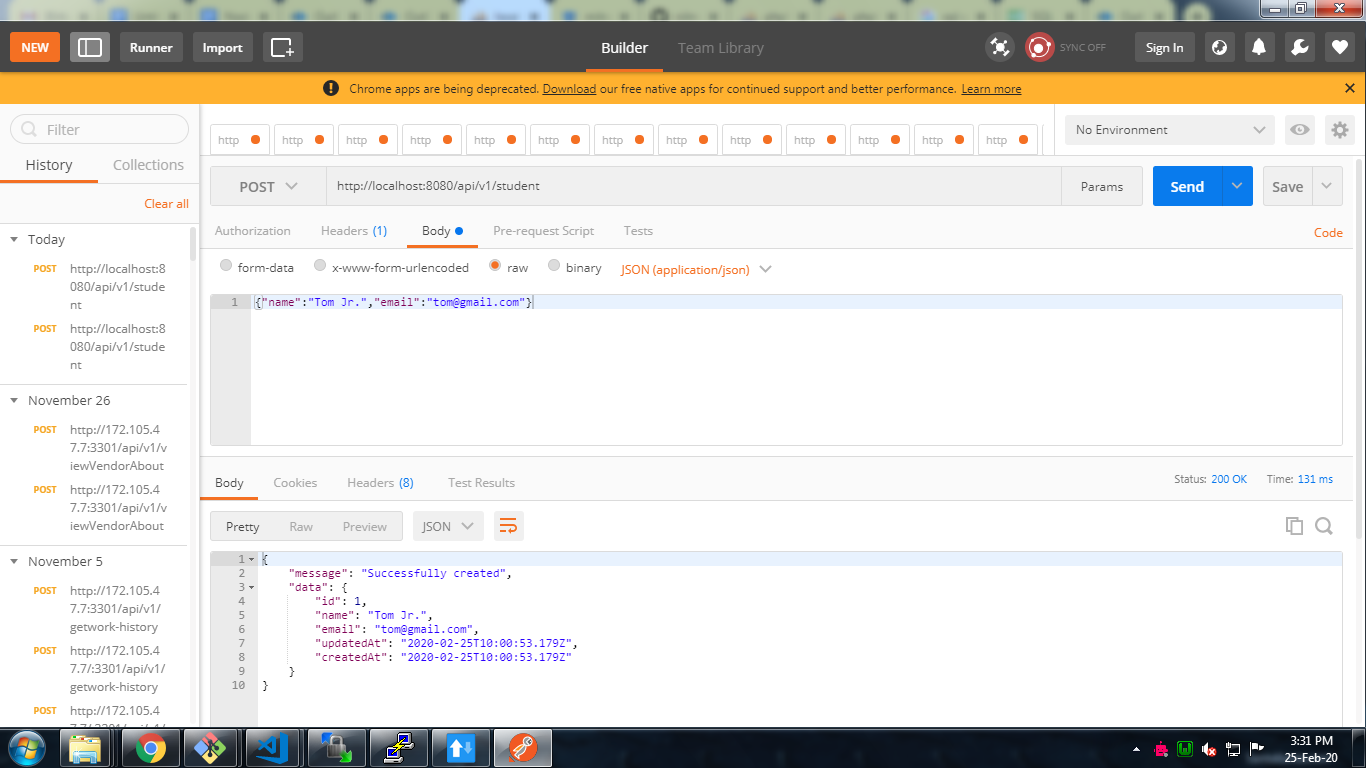
For check this api go to your rest api hit http://localhost:8080/api/v1/student in post method
In this same process we create other operation like view, edit and delete. So, write this code in our crudApplication.controller.js
// Find a single Student with an id
 exports.findOne = (req, res) => {
   const id = req.params.id;
    Student.findByPk(id)
     .then(data => {
       res.status(200).send(data);
     })
     .catch(err => {
       res.status(500).send({
         message: "Error retrieving Student with id=" + id
       });
     });
 };
  // Update a Student by the id in the request
 exports.update = (req, res) => {
   const id = req.params.id;
    Student.update(req.body, {
     where: { id: id }
   })
     .then(num => {
       if (num == 1) {
         res.send({
           message: "Student was updated successfully."
         });
       } else {
         res.send({
           message: `Cannot update Student with id=${id}. Maybe Student was not found or req.body is empty!`
         });
       }
     })
     .catch(err => {
       res.status(500).send({
         message: "Error updating Student with id=" + id
       });
     });
 };
  // Delete a Student with the specified id in the request
 exports.delete = (req, res) => {
   const id = req.params.id;
    Student.destroy({
     where: { id: id }
   })
     .then(num => {
       if (num == 1) {
         res.send({
           message: "Student was deleted successfully!"
         });
       } else {
         res.send({
           message: `Cannot delete Student with id=${id}. Maybe Student was not found!`
         });
       }
     })
     .catch(err => {
       res.status(500).send({
         message: "Could not delete Student with id=" + id
       });
     });
 };
And also add routes in crudApplication.routes.js page :
/ Retrieve all Student
   router.get("/", student.findAll);

   // Retrieve a single Tutorial with id
   router.get("/:id", student.findOne);

   // Update a Student with id
   router.put("/:id", student.update);

   // Delete a Student with id
   router.delete("/:id", student.delete);
So :
For create a new student api is : post http://localhost/api/v1/student
For find one student api is : get http://localhost/api/v1/student/:id
To find all student api is : get http://localhost/api/v1/student
For update one student api is : put http://localhost/api/v1/student/:id
For delete one student api is : delete http://localhost/api/v1/student/:id
You can also check this app in my GitHub a/c : https://github.com/nilmonigithub/crudApp
Conclusion:
It is very important for Ionic Mobile app development. Please share your reviews in the comment section.


Comments