Securing your WordPress Website: An Ultimate Guide- 2021
"
Every website owner should pay attention to WordPress security. Around 10,000+ websites are blacklisted every day by Google for malware, and around 50,000 websites are blacklisted every week for phishing. Here we will discuss securing your WordPress Website.
When it comes to securing your WordPress site, it is important to follow the best practices. Our WordPress security tips will help you protect your website from hackers and malware.
Why Website Security is Important?
You can suffer serious financial and reputational damage from a hacked WordPress site. Users' personal information and passwords can be stolen and installed malicious software. Hackers can even distribute malware.
In the worst-case scenario, hackers may demand ransomware to gain access to your website. A Google report in March 2016 said more than 50 million website users had been notified of a website they were visiting that might contain malware or stealing personal information.
It is the responsibility of business owners to secure their physical store building, just the same as it is your responsibility to secure your online business website.
Keeping WordPress Updated
WordPress is open-source software that is regularly updated and maintained. Automated updates are normally installed by WordPress. But Major releases require a manual update.
WordPress also offers thousands of plugins and themes that you can install on your website. Plugin and theme developers regularly release updates to these plugins and themes.
Your WordPress site should be upgraded to these latest WordPress versions for maximum security and stability. Updating WordPress core, plugins, and themes is vital.
Passwords and User Permissions
Stealing passwords is the most common method of hacking WordPress. By creating unique passwords for your website, you can make that much more difficult. Additionally, your custom email addresses will use the domain name of your website when they are sent from your FTP accounts, your database, and your WordPress hosting account.
Beginners dislike strong passwords because they are hard to remember. You no longer have to remember passwords, which is a good thing. Password managers are available. You can manage your WordPress passwords by using these WordPress Password managers.
Another way to reduce the risk is to not share your WordPress administrative account with anyone unless you absolutely have to. Another way to reduce the risk is to not share your WordPress administrative account with anyone unless you absolutely have to.
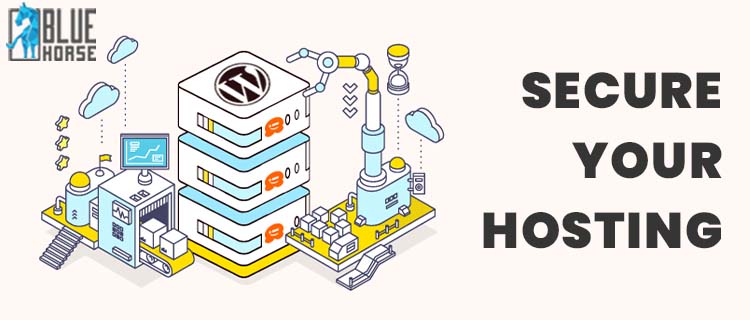
The Role of WordPress Hosting
For your WordPress site to be secure, your hosting service is key. Shared hosting providers like BlueHost and Site ground take extra steps to protect their servers against common threats.
Here's how a good web host keeps your data and websites safe behind the scenes.
- They continuously monitor their network for suspicious activity.
- All good hosting companies have tools in place to prevent large scale DDOS attacks
- They keep their server software, PHP versions, and hardware up to date to prevent hackers from exploiting a known security vulnerability in an old version.
- They have ready to deploy disaster recovery and accidents plans which allows them to protect your data in case of a major accident.
With a shared hosting plan, you share the server resources with many other customers. The risk of cross-site contamination is increased when a hacker uses a neighboring site to attack your own.
Your website will be more secure if you are using a managed WordPress hosting service. You can secure your website with WordPress-managed hosting by automating backups, updates, and security configuration, for example.
We recommend WPEngine as our preferred managed WordPress hosting provider. They’re also the most popular ones in the industry.
WordPress Security in Easy Steps
As WordPress beginners, we know that improving security can be a daunting task. This is especially true if you aren't tech-savvy. There's no need to feel alone.
We have helped thousands of WordPress users in hardening their WordPress security.
We will show you how you can improve your WordPress security with just a few clicks (no coding required).
If you can point-and-click, you can do this!
-
Install a WordPress Backup Solution
Backups are your first line of defense against any WordPress attack. Nothing is 100% secure. The government website can also be hacked, so can yours.
Your WordPress site can quickly be restored from a backup if something goes wrong. There are many free and paid backup plugins that you can use for WordPress. When it comes to backups, the most important thing is to regularly save full-site backups to a remote location (not your hosting account).
We recommend storing it on a cloud service like Amazon, Dropbox, or private clouds like Stash.
Based on how frequently you update your website, the ideal setting might be either once a day or real-time backups.
Thankfully this can be easily done by using plugins like UpdraftPlus or BlogVault. They are both reliable and most importantly easy to use (no coding needed).
-
Best WordPress Security Plugin
Having your website's backups up to date is first and foremost, but we also need to install an auditing and monitoring system to keep an eye on everything that happens.
This includes file integrity monitoring, failed login attempts, malware scanning, etc.
Thankfully, this can be all taken care of by the best free WordPress security plugin, Sucuri Scanner. You need to install and activate the free Sucuri Security plugin.
This WordPress security plugin is very powerful, so browse through all the tabs and settings to see all that it does such as Malware scanning, Audit logs, Failed Login Attempt tracking, etc.
-
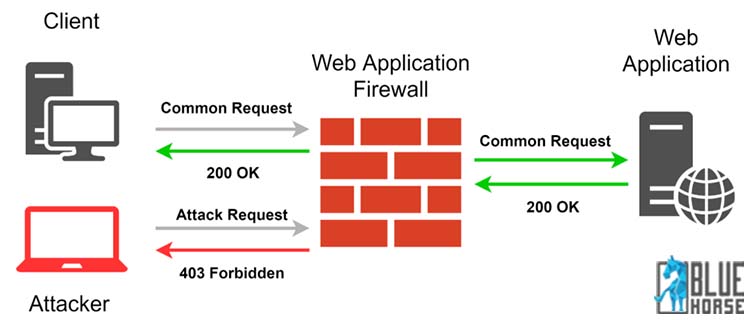
Enable Web Application Firewall (WAF)
When it comes to WordPress security, the easiest way to protect your site is to use a web application firewall (WAF).
A website firewall blocks all malicious traffic before it even reaches your website.
DNS Level Website Firewall – These firewalls route your website traffic through their cloud proxy servers. This allows them to only send genuine traffic to your web server.
Application Level Firewall – These firewall plugins examine the traffic once it reaches your server but before loading most WordPress scripts. This method is not as efficient as the DNS level firewall in reducing the server load.
We use and recommend Sucuri as the best web application firewall for WordPress. The best part about Sucuri’s firewall is that it also comes with a malware cleanup and blacklist removal guarantee. Basically, if you were to be hacked under their watch, they guarantee that they will fix your website (no matter how many pages you have).
This is a pretty strong warranty because repairing hacked websites is expensive. Security experts normally charge $250 per hour. Whereas you can get the entire Sucuri security stack for $199 per year.
-
Move Your WordPress Site to SSL/HTTPS
SSL (Secure Sockets Layer) is a protocol that encrypts the data transfer between your website and users' browser. This encryption makes it harder for someone to sniff around and steal information.
Once you enable SSL, your website will use HTTPS instead of HTTP, you will also see a padlock sign next to your website address in the browser.

SSL certificates were typically issued by certificate authorities, and their prices start from $80 to hundreds of dollars each year. Due to added cost, most website owners opted to keep using the insecure protocol.
To fix this, a non-profit organization called Let’s Encrypt decided to offer free SSL Certificates to website owners. Their project is supported by Google Chrome, Facebook, Mozilla, and many more companies.
Now, it is easier than ever to start using SSL for all your WordPress websites. Many hosting companies are now offering a free SSL certificate for your WordPress website.
If your hosting company does not offer one, then you can purchase one from Domain.com. They have the best and most reliable SSL deal in the market. It comes with a $10,000 security warranty and a TrustLogo security seal.
-
WordPress Security for DIY Users
If you do everything that we have mentioned thus far, then you’re in pretty good shape.
But as always, there’s more that you can do to harden your WordPress security.
Some of these steps may require coding knowledge.
-
Change the Default “admin†username
In the old days, the default WordPress admin username was “adminâ€. Since usernames make up half of the login credentials, this made it easier for hackers to do brute-force attacks.
Thankfully, WordPress has since changed this and now requires you to select a custom username at the time of installing WordPress.
However, some 1-click WordPress installers still set the default admin username to “adminâ€. If you notice that to be the case, then it’s probably a good idea to switch your web hosting.
Since WordPress doesn’t allow you to change usernames by default, there are three methods you can use to change the username.
- Create a new admin username and delete the old one.
- Use the Username Changer plugin
- Update username from phpMyAdmin
-
Disable File Editing
WordPress comes with a built-in code editor which allows you to edit your theme and plugin files right from your WordPress admin area. In the wrong hands, this feature can be a security risk which is why we recommend turning it off.
You can easily do this by adding the following code in your wp-config.php file.
// Disallow file edit
define( 'DISALLOW_FILE_EDIT', true );
Alternatively, you can do this with one one 1-click using the Hardening feature in the free Sucuri plugin that we mentioned above.
-
Disable PHP File Execution in Certain WordPress Directories
Another way to harden your WordPress security is by disabling PHP file execution in directories where it’s not needed such as /wp-content/uploads/.
You can do this by opening a text editor like Notepad and paste this code:
Next, you need to save this file as .htaccess and upload it to /wp-content/uploads/ folders on your website using an FTP client.
For a more detailed explanation, see our guide on how to disable PHP execution in certain WordPress directories
Alternatively, you can do this with one one 1-click using the Hardening feature in the free Sucuri plugin that we mentioned above.
-
Limit Login Attempts
By default, WordPress allows users to try to log in as many times as they want. This leaves your WordPress site vulnerable to brute force attacks. Hackers try to crack passwords by trying to log in with different combinations.
This can be easily fixed by limiting the failed login attempts a user can make. If you’re using the web application firewall mentioned earlier, then this is automatically taken care of.
However, if you don’t have the firewall setup, then proceed with the steps below. You need to install and activate the Login LockDown plugin.
-
Add Two Factor Authentication
The two-factor authentication technique requires users to log in by using a two-step authentication method. The first one is the username and password, and the second step requires you to authenticate using a separate device or app.
Most top online websites like Google, Facebook, Twitter, allow you to enable it for your accounts. You can also add the same functionality to your WordPress site.
You need to install and activate the Two Factor Authentication plugin.
-
Password Protect WordPress Admin and Login Page
Normally, hackers can request your wp-admin folder and login page without any restriction. This allows them to try their hacking tricks or run DDoS attacks.
You can add additional password protection on a server-side level, which will effectively block those requests.
-
Disable Directory Indexing and Browsing
Directory browsing can be used by hackers to find out if you have any files with known vulnerabilities, so they can take advantage of these files to gain access.
Directory browsing can also be used by other people to look into your files, copy images, find out your directory structure, and other information. This is why it is highly recommended that you turn off directory indexing and browsing.
You need to connect to your website using FTP or cPanel’s file manager. Next, locate the .htaccess file in your website’s root directory. If you cannot see it there, then refer to our guide on why you can’t see the .htaccess file in WordPress.
After that, you need to add the following line at the end of the .htaccess file:
Options -IndexesDon’t forget to save and upload the .htaccess file back to your site.
-
Disable XML-RPC in WordPress
XML-RPC was enabled by default in WordPress 3.5 because it helps to connect your WordPress site with web and mobile apps.
Because of its powerful nature, XML-RPC can significantly amplify brute-force attacks.
For example, traditionally if a hacker wanted to try 500 different passwords on your website, they would have to make 500 separate login attempts which will be caught and blocked by the login lockdown plugin.
But with XML-RPC, a hacker can use the system.multicall function to try thousands of passwords with say 20 or 50 requests.
This is why if you’re not using XML-RPC, then we recommend that you disable it.
-
Automatically log out Idle Users in WordPress
Logged-in users can sometimes wander away from the screen, and this poses a security risk. Someone can hijack their session, change passwords, or make changes to their account.
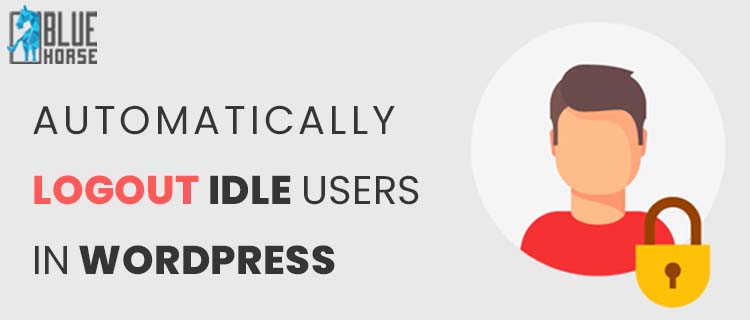
This is why many banking and financial sites automatically log out an inactive user. You can implement similar functionality on your WordPress site as well.
You will need to install and activate the Inactive Logout plugin.
-
Add Security Questions to WordPress Login Screen
Adding a security question to your WordPress login screen makes it even harder for someone to get unauthorized access.
You can add security questions by installing the WP Security Questions plugin. Upon activation, you need to visit the Settings » Security Questions page to configure the plugin settings.
For more detailed instructions, see our tutorial on how to add security questions to the WordPress login screen.
-
Scanning WordPress for Malware and Vulnerabilities
if you have a WordPress security plugin installed, then those plugins will routinely check for malware and signs of security breaches.
However, if you see a sudden drop in website traffic or search rankings, then you may want to manually run a scan. You can use your WordPress security plugin, or use one of these malware and security scanners.
Running these online scans is quite straightforward, you just enter your website URLs and their crawlers go through your website to look for known malware and malicious code.
Now keep in mind that most WordPress security scanners can just scan your website. They cannot remove the malware or clean a hacked WordPress site.
Recovering a Hacked WordPress Website- Beginners Guide 2021
Step 1. Identify the Hack
When dealing with a website hack, you’re under a lot of stress. Try to remain calm and write down everything that you can about the hack.
Below is a good checklist to run down through:
Can you log in to your WordPress admin panel?
Is your WordPress site redirecting to another website?
Does your WordPress site contain illegitimate links?
Is Google marking your website as insecure?
Write down the list because this will help you as you talk with your hosting company or even as you go down the steps below to fix your site.
Also, it’s crucial that you change your passwords before you start the clean-up. You will also need to change your passwords when you’re done cleaning the hack.
Step 2. Check with your Hosting Company
Most good hosting providers are very helpful in these situations. They have experienced staff who deal with this kind of thing daily, and they know their hosting environment which means they can guide you better. Start by contacting your web host and follow their instructions.
Sometimes the hack may have affected more than just your site, especially if you are on shared hosting. Your hosting provider may also be able to give you additional information about the hack such as how it originated, where the backdoor is hiding, etc. From our experience, HostGator and Siteground both are very helpful when something like this happens.
You may even get lucky and the host might clean up the hack for you.
Step 3. Restore from Backup
If you have backups for your WordPress site, then it may be best to restore from an earlier point when the site wasn’t hacked. If you can do this, then you’re golden.

However, if you have a blog with daily content, then you risk losing blog posts, new comments, etc. In those cases, weigh the pros and cons.
Worst case, if you don’t have a backup, or your website had been hacked for a long time, and you don’t want to lose the content, then you can manually remove the hack.
Step 4. Malware Scanning and Removal
Look at your WordPress site and delete any inactive WordPress themes and plugins. More often than not, this is where hackers hide their backdoor.
Backdoor is referred to as a method of bypassing normal authentication and gaining the ability to remotely access the server while remaining undetected. Most smart hackers always upload the backdoor as the first thing. This allows them to regain access even after you find and remove the exploited plugin.
Once you have done that, now go ahead and scan your website for the hacks.
You should install the following free plugins on your website: Sucuri WordPress Auditing and Theme Authenticity Checker (TAC).
When you set these up, the Sucuri scanner will tell you the integrity status of all your core WordPress files. In other words, it shows you where the hack is hiding.
The most common places are themes and plugin directories, uploads directory, wp-config.php, wp-includes directory, and .htaccess file.
Next, run the Theme Authenticity Checker, and it will display your results like this:
If the theme authenticity checker finds any suspicious or malicious code in your themes, it will show a details button next to the theme with the reference to the theme file that is infected. It will also show you the malicious code is found.
Step 5. Check User Permissions
Look in the user’s section of WordPress to make sure only you and your trusted team members have administrator access to the site.
If you see a suspicious user there, then delete them.
Step 6. Change Your Secret Keys
Since WordPress 3.1, WordPress generates a set of security keys that encrypts your passwords. Now if a user stole your password, and they are still logged into the site, then they will remain logged in because their cookies are valid. To disable the cookies, you have to create a new set of secret keys. You need to generate a new security key and add it to your wp-config.php file.
Step 7. Change Your Passwords AGAIN
Yes, you changed the passwords in step 1. Now do it again!
You need to update your WordPress password, cPanel / FTP / MySQL password, and basically anywhere else that you used this password.
We highly recommend that you use a strong password. Read our article on the best way to manage passwords.
If you have a lot of users on your site, then you may want to force a password reset for all of them.
"