How to create Custom Registration Forms in Magento 2: A Comprehensive Guide for E-commerce Success

Explore our in-depth guide to creating a custom registration form in Magento 2, leveraging the robust customization capabilities of this e-commerce platform. Creating a frontend module for a registration form is an excellent way to tailor your online store to meet specific business needs. Whether you're a seasoned Magento developer or just getting started, this step-by-step tutorial will walk you through the process of setting up a frontend module to seamlessly integrate a registration form into your Magento 2 store.
In this tutorial, we will cover everything from establishing the necessary folder structure and enabling the module to create routes, controllers, and frontend components. By the end, you will not only have a fully functioning registration form on the frontend of your Magento 2 store but also a solid understanding of the key components involved in building custom modules. Let's dive in and empower your Magento store with a user-friendly registration experience!
1. Folder Structure:
Setting Up Module Structure
A. Create a folder structure:
- `app/code/Vendor/Module`
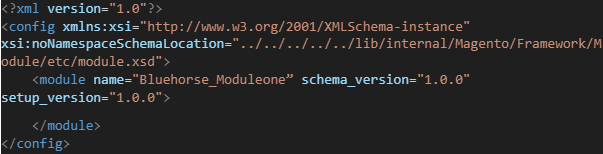
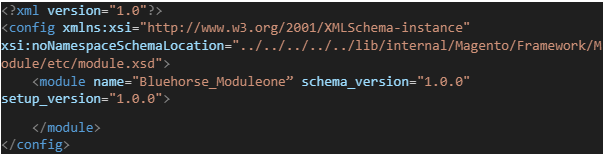
B. Create `module.xml`:
- Path: `app/code/Vendor/Module/etc/module.xml`
- Content:
C. Create `registration.php`:
- Path: `app/code/Vendor/Module/registration.php`
- Content:
2. Module Installation
- Check module status:
php bin/magento module:status
php bin/magento module:enable Vendor_Module
php -dmemory_limit=2G bin/magento setup:upgrade
php -dmemory_limit=2G bin/magento setup:static-content:deploy -f
php bin/magento cache:clean
3. Creating Routes:
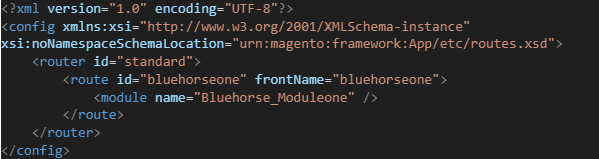
- Create `routes.xml`:
- Path: `app/code/Vendor/Module/etc/frontend/routes.xml`
- Content:
4. Controller Setup
- Create Controller folder:
- Path: `app/code/Vendor/Module/Controller`
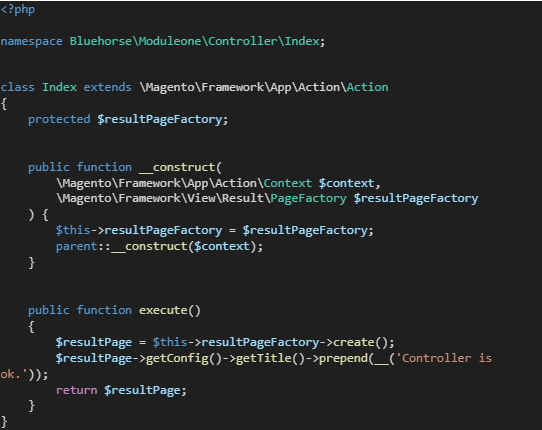
- Create action files:
- Path: `app/code/Vendor/Module/Controller/ControllerName/ActionName.php`
- Content:
5. Frontend Form
- Create view folders:
- `view/frontend/layout`
- `view/frontend/templates`
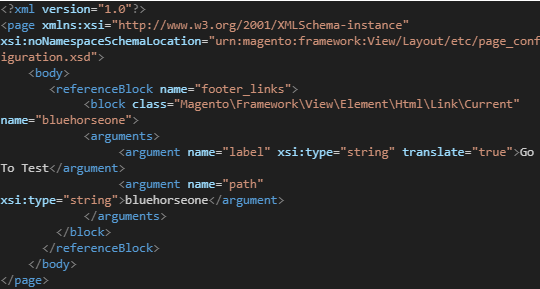
Create `default.xml` for footer link:
- Path: `app/code/Vendor/Module/view/frontend/layout/default.xml`
- Content:
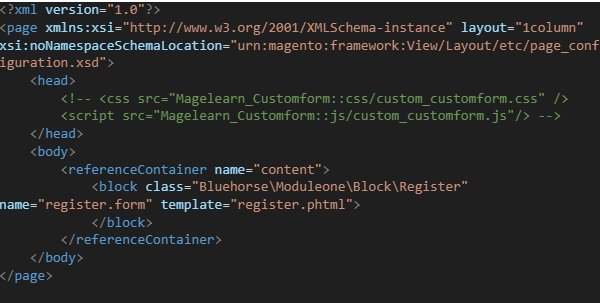
Create `frontname_controller_action.xml` for form display:
- Path: `app/code/Vendor/Module/view/frontend/layout/frontname_controller_action.xml`
- Content:
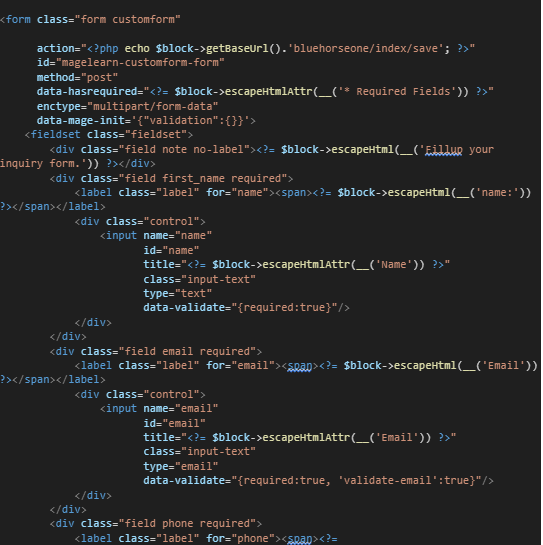
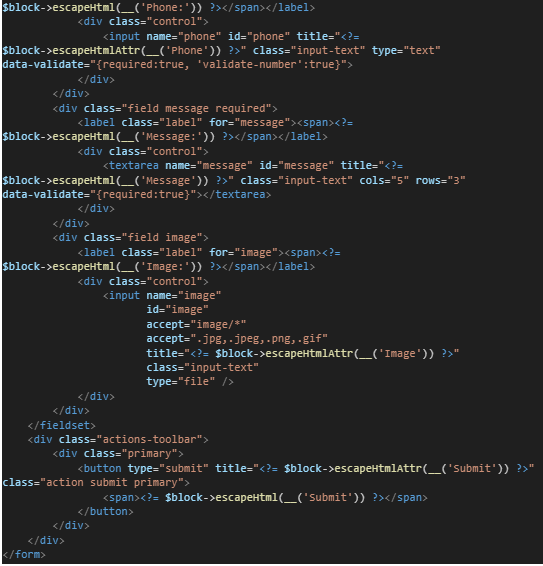
Create form template:
- Path: `app/code/Vendor/Module/view/frontend/templates/register.phtml`
- Content:

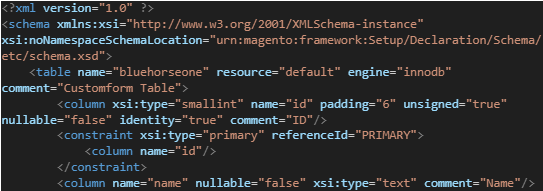
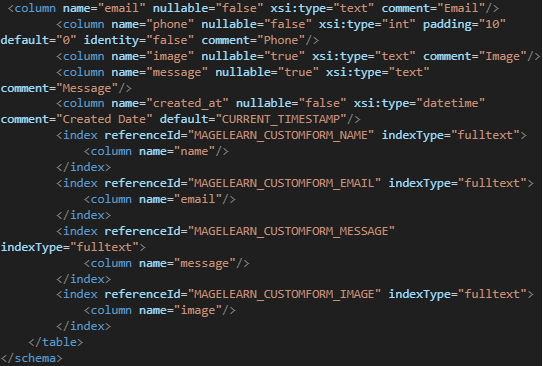
6. Database Setup
- Create `db_schema.xml`:
- Path: `app/code/Vendor/Module/etc/db_schema.xml`
- Content:
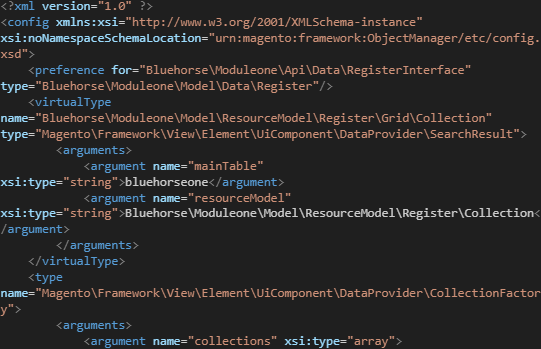
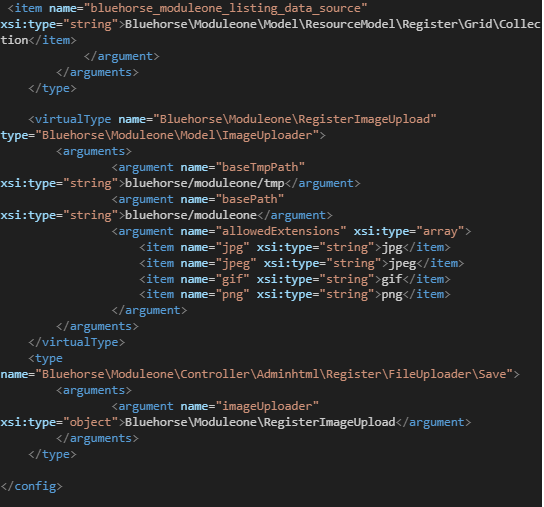
7. Dependency Injection (DI) Setup
- Create `di.xml`:
- Path: `app/code/Vendor/Module/etc/di.xml`
- Content:
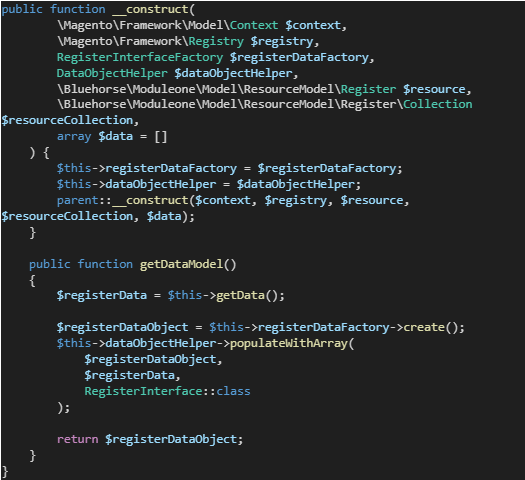
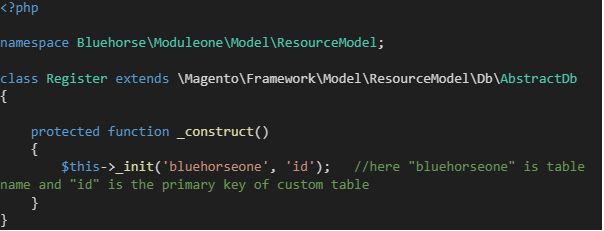
8. Model and ResourceModel
- Create Model ,ResourceModel:
- Model: `app/code/Vendor/Module/Model/Register.php`
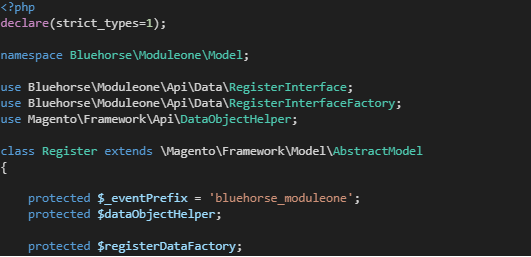
- ResourceModel: `app/code/Vendor/Module/Model/ResourceModel/Register.php`
- Content:
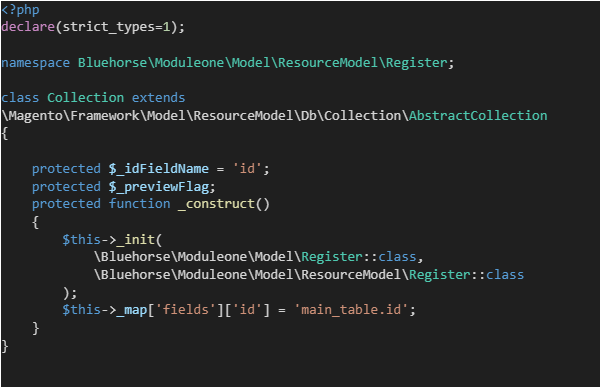
Collection.php : `app/code/Bluehorse/Moduleone/Model/ResourceModel/Register/Collection.php`
Content:
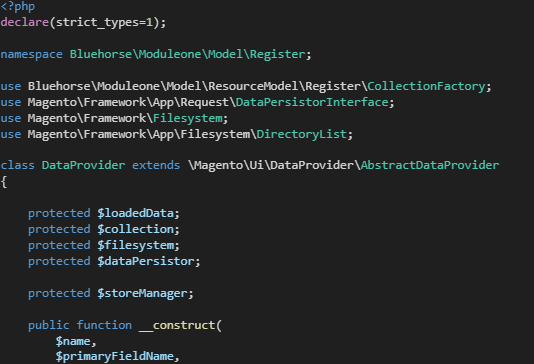
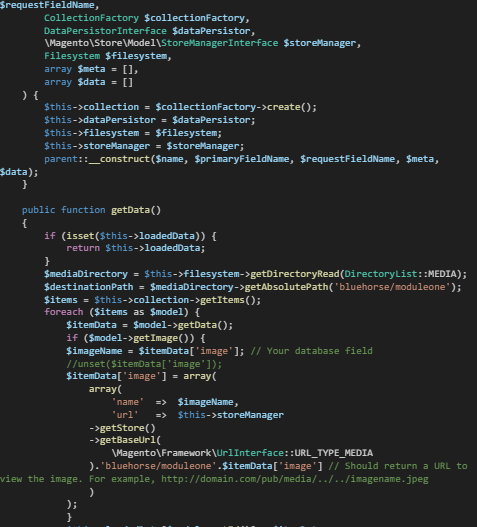
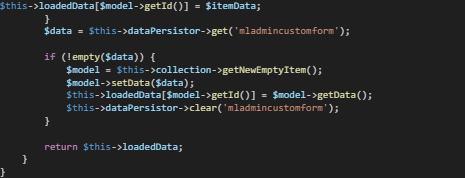
9. Data Provider
- Create Data Provider:
- Path: `app/code/Vendor/Module/Model/Register/DataProvider.php`
- Content:
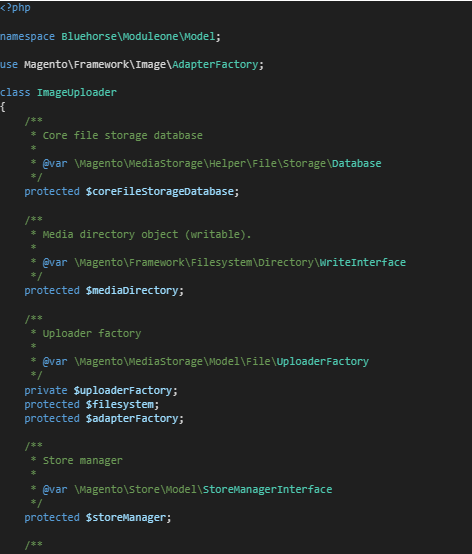
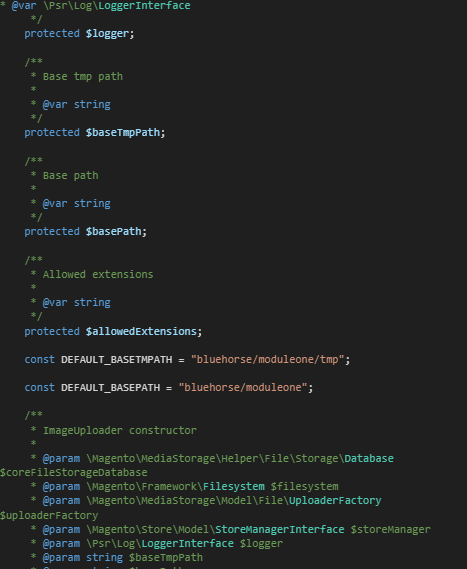
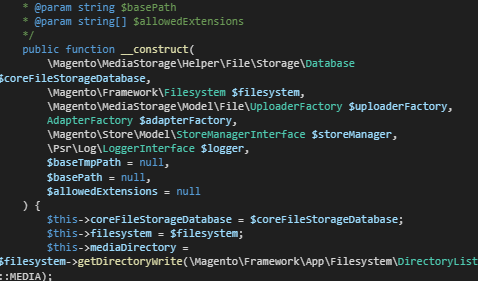
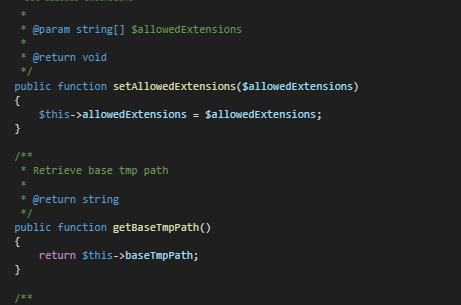
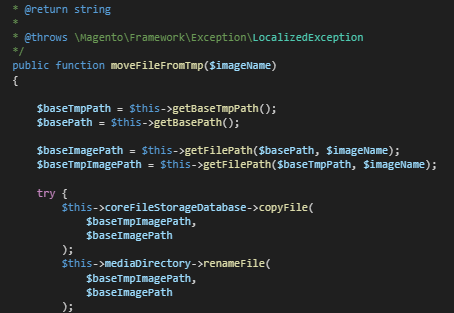
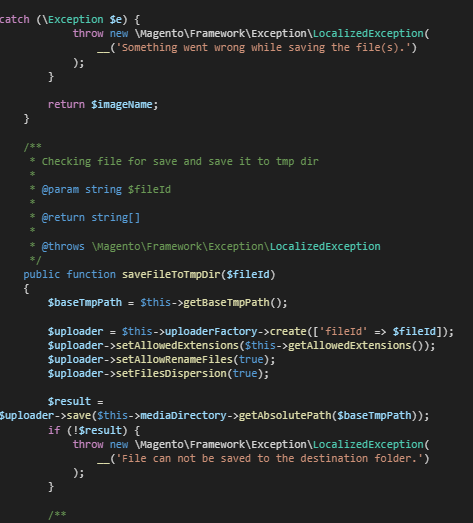
10. Image Uploader
- Create Image Uploader:
- Path: `app/code/Vendor/Module/Model/ImageUploader.php`
- Content:


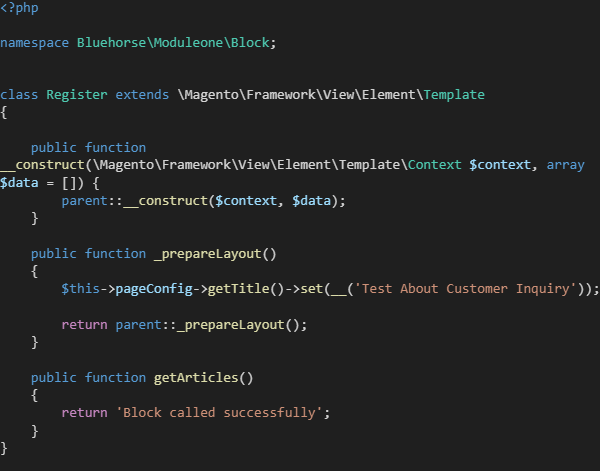
11. Block Setup
- Create Block:
- Path: `app/code/Vendor/Module/Block/Register.php`
- Content:
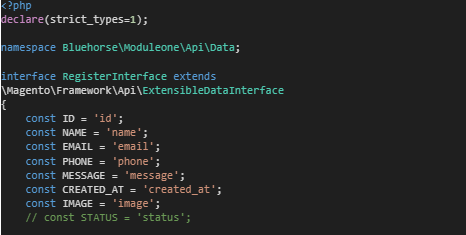
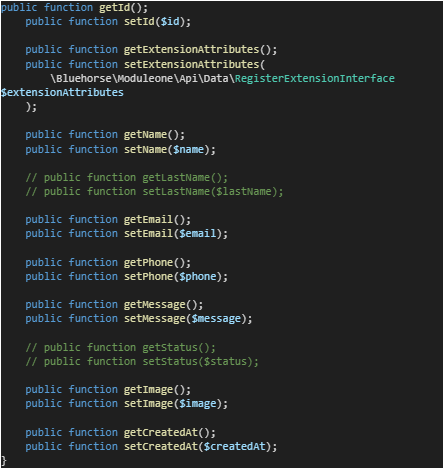
12. API Interface
- Create API Interface:
- Path: `app/code/Vendor/Module/Api/Data/RegisterInterface.php`
- Content:
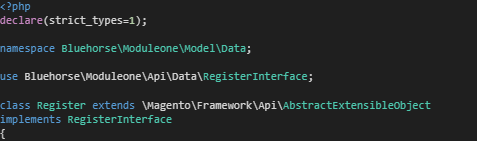
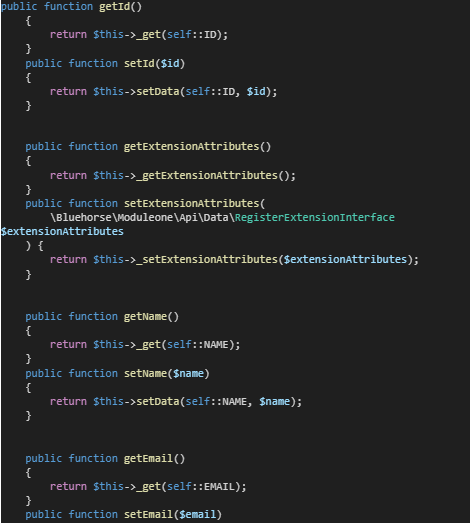
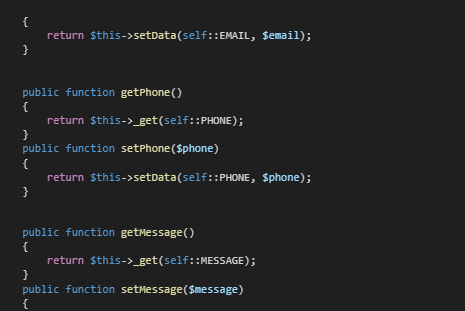
13. Model Data
- Create Model Data:
- Path: `app/code/Vendor/Module/Model/Data/Register.php`
- Content:

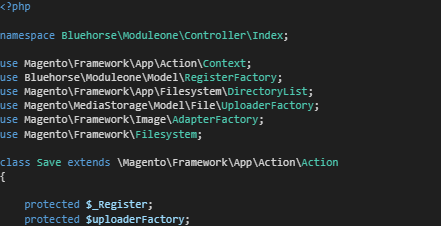
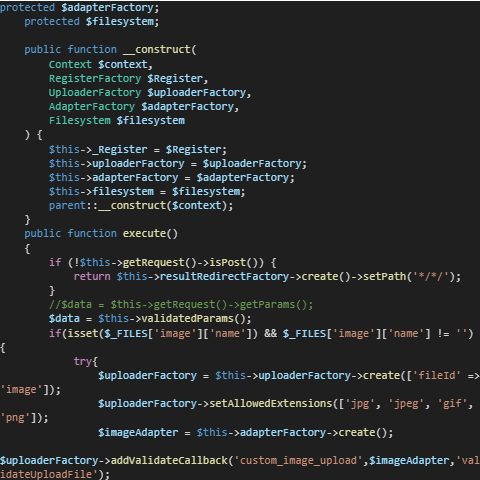
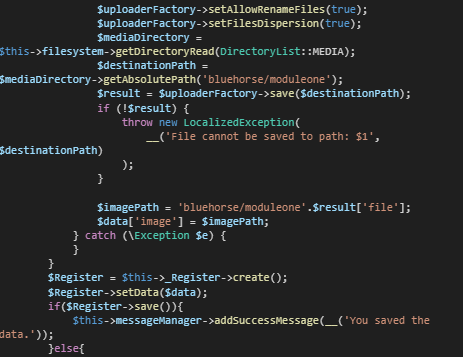
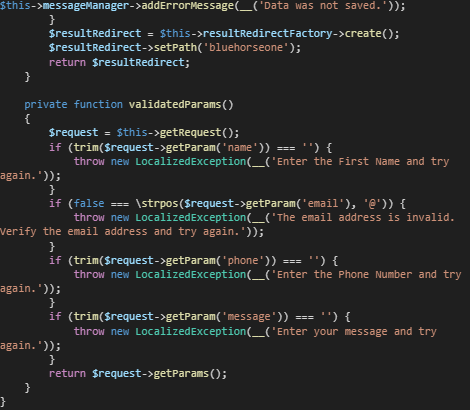
14. Controller for Form Submission
- Create Controller for form submission:
- Path: `app/code/Vendor/Module/Controller/Index/Save.php`
- Content:
15. Final Steps
- Enable the module:
php -dmemory_limit=2G bin/magento setup:upgrade
php -dmemory_limit=2G bin/magento setup:static-content:deploy -f
php bin/magento cache:clean
Conclusion: You've successfully navigated through the intricacies of creating a Magento 2 frontend module for a registration form. By following this tutorial, you've gained valuable insights into the structure of a Magento 2 module, including setting up routes, controllers, frontend components, and even integrating a custom database schema.
As you explore the possibilities of Magento 2 customization, keep in mind that this registration form module is just the tip of the iceberg. Magento's flexibility allows you to extend and enhance your online store to meet the unique requirements of your business.
Remember, the key to mastering Magento development is practice and experimentation. Continue to explore the Magento ecosystem, stay updated with the latest developments, and don't hesitate to dive into more advanced features as you become more comfortable with the platform.
We hope this guide has been a valuable resource in your Magento 2 journey. Feel free to check out our other tutorials for further insights into Magento development, and may your custom registration form contribute to an even more engaging and user-friendly online shopping experience for your customers. Happy coding!
new.jpg)


Comments