How to add customizable products with custom fields on Shopify

Looking to enhance your Shopify store? Learn how to add custom fields to your product pages for personalized shopping experiences. Avoid app fees and speed issues by implementing code edits for various field types. From short text to file uploads, I'll guide you through the process. Let's get started!
There are several reasons why you might want to add a custom field to your product page:
- To allow store visitors to personalize a product before purchase
- To surpass the 100 variant limit for your products
While there are many apps that offer this capability, they often charge monthly fees, can slow down your store's loading speed, and may affect your Cumulative Layout Shift (CLS) score, an important SEO metric. (When using an app, fields are added after page load with JavaScript, which can disrupt the layout of your form)
In my opinion, the best approach is to implement custom fields through code edits. Below, I'll provide you with the code for various field types:
- Short text
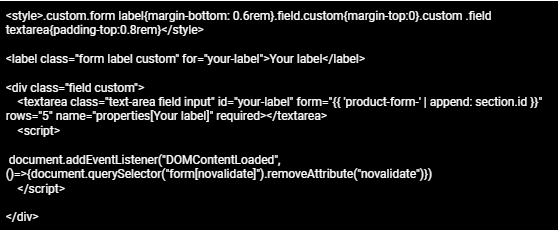
- Long text
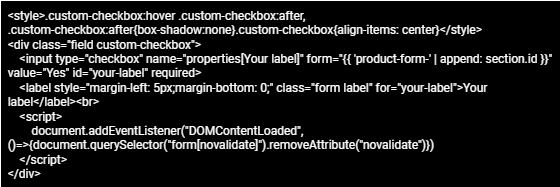
- Checkbox
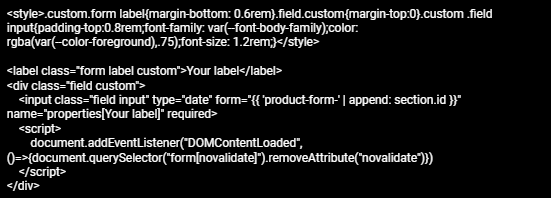
- Date
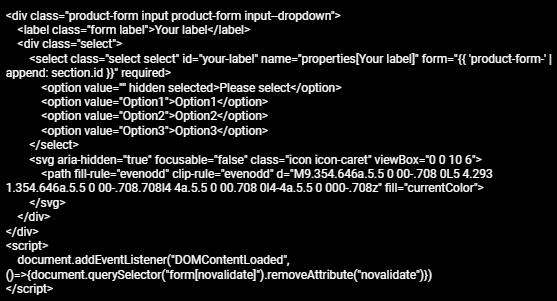
- Drop-down select
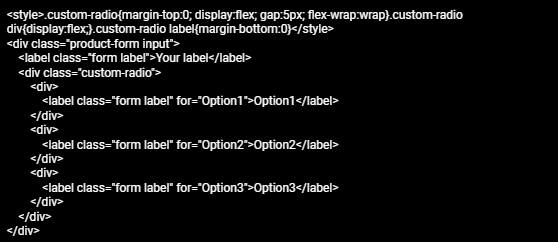
- Radio buttons
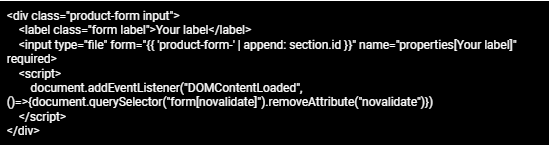
- File/Image upload
The value of the custom field will be displayed on the Cart page, Checkout page, and in your orders on the admin panel once a purchase is made. I'll also show you how to make that value appear on the confirmation email and packing slip.
- Create a New Product Page Template
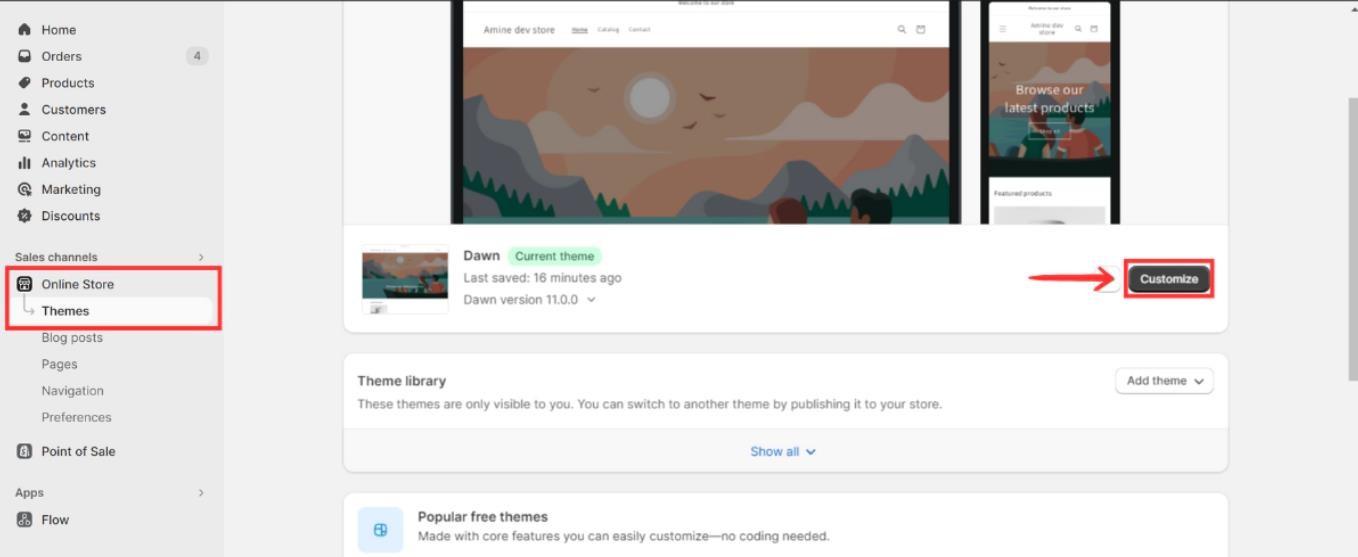
You probably don’t want the fields to appear for all your products, so let's create a new product page template for the products where you want the field to show. To do this, go to the Shopify admin panel, click on Themes under Online Store, then click Customize on your live theme. Since we need to create the template on the live theme for it to appear in the Shopify admin.
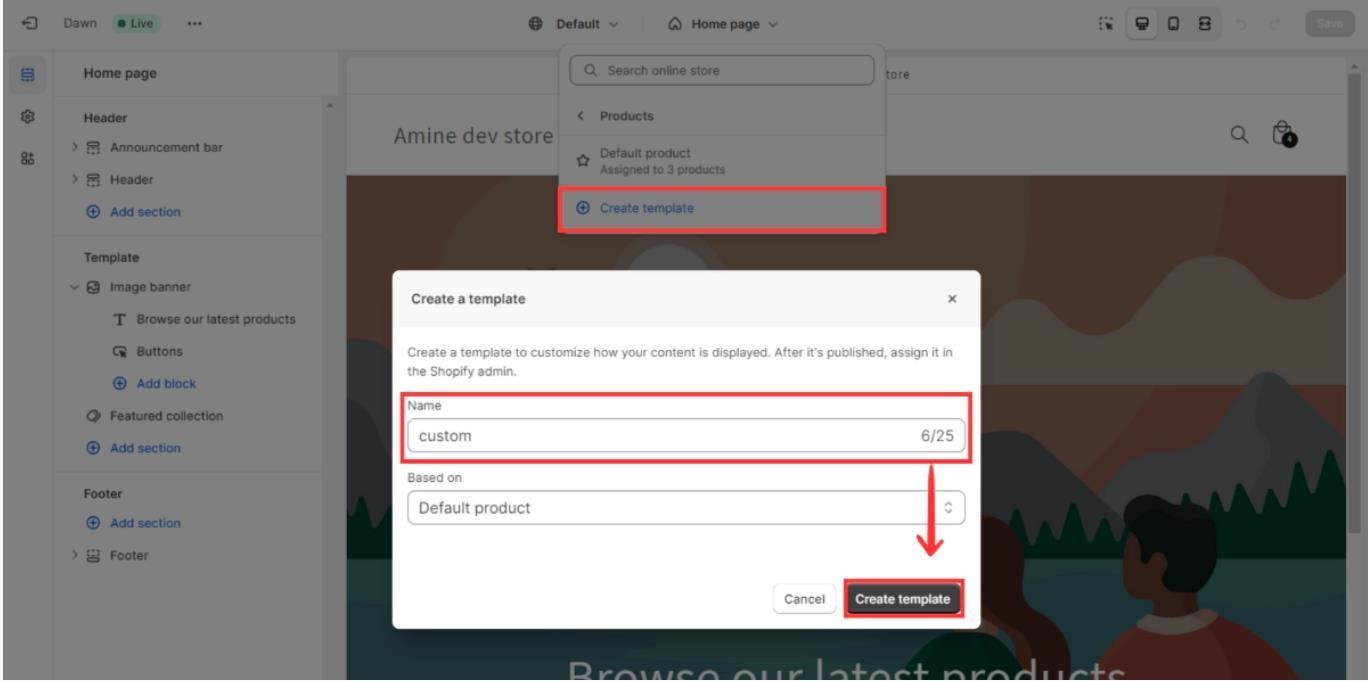
Then, at the top of the screen, click on the “Home page” dropdown menu and select 'products.

Click on 'Create template,' and give it any name; for example, you can name it 'custom.'
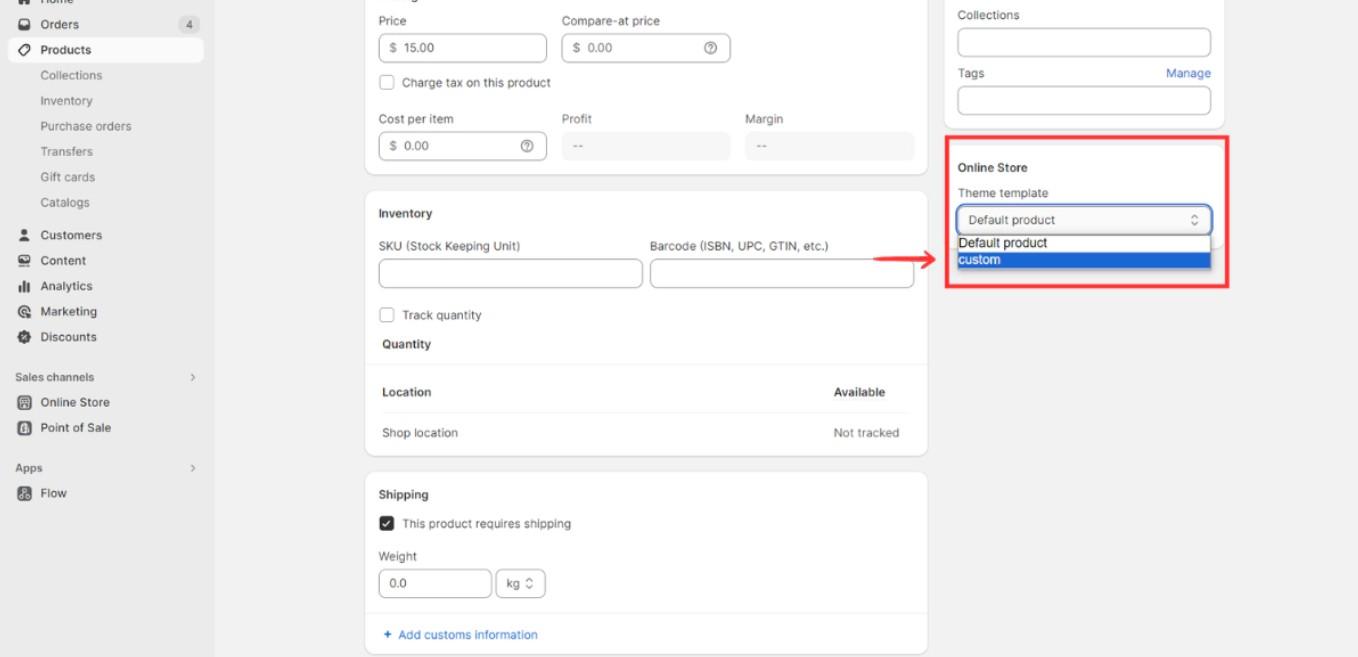
The next step is to assign the custom template page to the products for which you want to show the custom fields. To do that, click on 'products,' choose the desired product, scroll down to 'theme templates,' select the new template, and save.
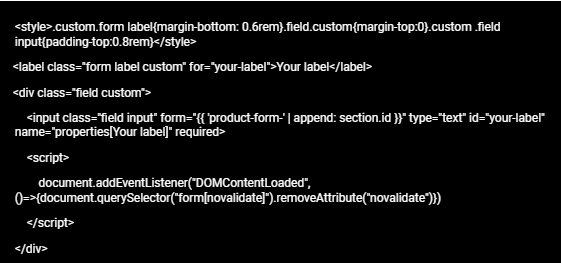
2. Copy the code snippet and paste the custom Liquid code.
For Short Text:
For Long Text:
For File Upload:
For Checkbox:
For Radio Button:
For Dropdown:
For Date:
3. Add the code to the theme
Once you've copied the code for the field, reopen the Shopify customizer and select the new product page template.

Create a fresh custom liquid block for the Product Information section.Drag the block to where you need it, typically under the variant picker. Paste your code and save.
Conclusion:
Enhance your Shopify store with custom fields to offer personalized shopping experiences, avoiding app fees and speed issues by implementing code edits for various field types. From short text to file uploads, I'll guide you through, ensuring a seamless shopping journey. Let's elevate your online store! By effectively adding customizable products with custom fields on Shopify, you provide a personalized shopping experience, potentially increasing sales and customer satisfaction.
.jpg)


Comments